Firestorm Gazala – British Turn 2 Analysis and Turn 3 Commander’s Intent
By Tom Burgess
The No Nice No Glory and Breakthrough Assault’s online Firestorm Gazala Campaign is now rolling into it’s third and final phase. The campaign has been driven so far by the 47 games played around the world from Turn 1 and Turn 2. The battle still hangs very much in the balance and either side could claim victory based on how the next four battles in Turn 3 go.
Turn 2 Analysis
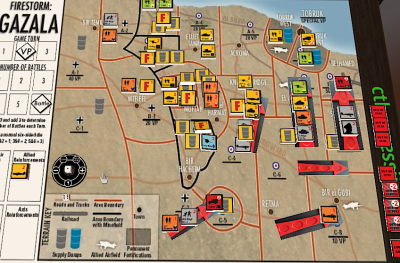
The five battles in Turn 2 went three to the German/Italian forces and two to the Commonwealth forces. Most importantly, British players in Turn 2 won some of the battles that mattered. The British line held to the south of Gazala at Knightsbridge (B5) and southwest of Gazala at El Adem (B6). However, to the southeast of Gazala at Belhamed (B7), Rommel did turn the flank and is now on the outskirts of Tobruk.
 My friend Charles and I recently met up to have another go at a Firestorm Gazala campaign. We had played a game, in Turn,One of the Campaign, where Charles’s Panzers managed to break up my British Motor Company and Crusader force. See that AAR . After breaking my reinforcing Crusaders and destroying all of my Anti-tank guns, his Panzers had free reign to take down my defending infantry.
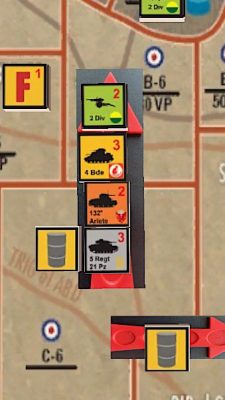
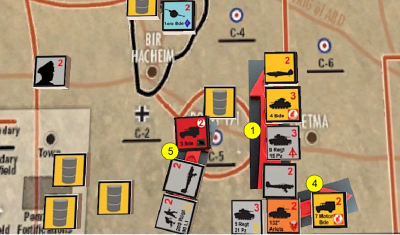 As part of the Breakthrough Assault and No Dice No Glory online Firestorm Gazala Campaign my friend, Charles, and I managed play Battle 4 from turn 1 in the campaign. I’d be playing the defending British with a force themed on the 7th Motor Brigade, while Charles was to roll with a 5th Panzer Regiment force with some loaned support from the 132nd Areite Division’s tanks.
 One aspect of playing World War Three Team Yankee that many people enjoy is list building. Trying to design the most perfect list to take on all opponents in all mission is almost a hobby withing itself. However commanders through history rarely ever get to “design” their force.
 The (PSC) will be releasing shortly* a much anticipated new set of rules covering World War III, while a “what if”, a conventional war has touched off and the forces of NATO and WARPAC are enjoined in battle across Europe, each in a desperate struggle to take/give ground before presumably, the nukes might fly.